
After completing your space design, you can use rendering to turn the 3D scene into an image that looks closer to real photography. This tutorial covers the complete workflow for creating a normal render, including image settings, lighting, environment, camera settings, and final output.
1. Open the Rendering Interface
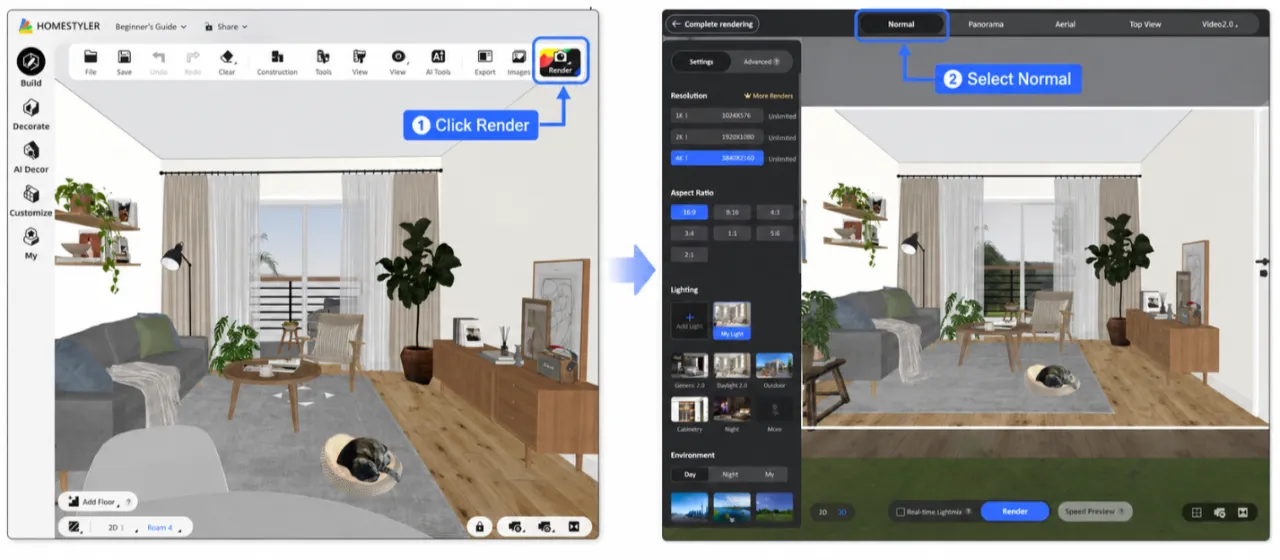
Click Render at the top of the design interface.
Several rendering modes are available, including Normal, Panorama, Aerial, Top View, and Video 2.0. For your first render, select Normal. It is suitable for common full-room views and close-up shots.
2. Set the Resolution and Aspect Ratio
Select a resolution under Resolution:

Start with 1K or 2K while testing. Once the result looks right, switch to 4K for the final render.
Next, select an option under Aspect Ratio:

The aspect ratio directly affects the visible composition area, so set it before adjusting the camera.
3. Choose a Lighting Template
Select a template under Lighting:
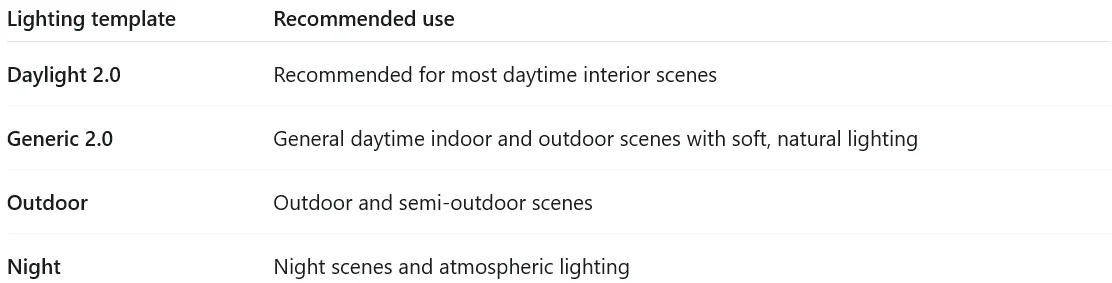
Beginners should start with a lighting template. If the scene requires further lighting adjustments, use Add Light to place lights manually.

4. Choose and Adjust the Environment
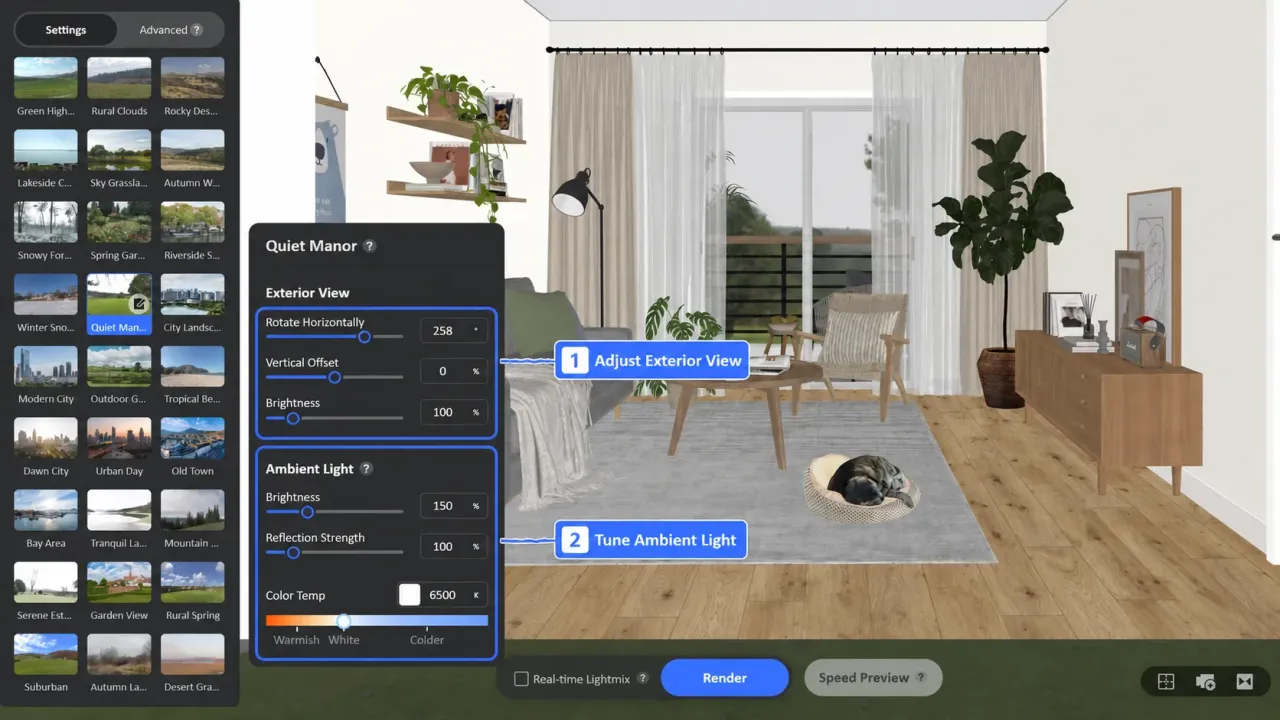
Under Environment, select an exterior view that matches the interior style and time of day. Start with the Day category for daytime scenes or switch to Night for nighttime scenes.
After selecting an environment, open its editing panel:

Beginners can focus on Rotate Horizontally, Vertical Offset, and the two Brightness settings. Leave the other settings at their defaults unless further adjustment is required.
5. Adjust the Camera and Composition
Move the Camera
Use the following shortcuts to move the camera:
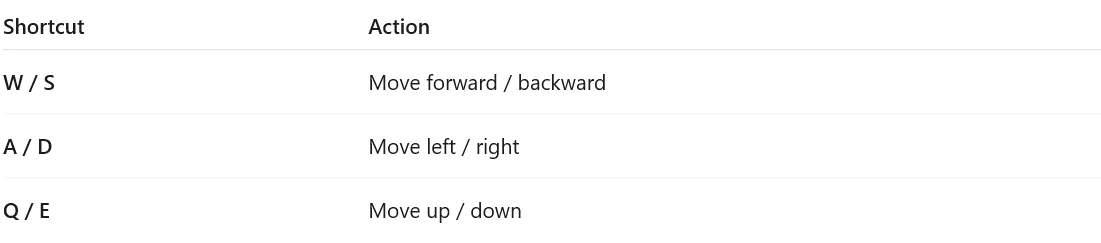
Use the mouse to adjust the viewing direction while moving the camera.
Set FOV, Height, and Clipping
- FOV: For a full-room view, start with the default 55°. Avoid exceeding 65°, as a wider FOV may stretch the edges of the image. For furniture or décor close-ups, use 20°–30° to keep the subject focused.
- Height: For a standard interior view, set the camera height to approximately 1000–1200 mm.
- Clipping: Enable this option when a wall or another object blocks the view, then adjust Clipping Depth. Avoid clipping through furniture, main walls, or the floor.

Use Composition Guides
Click the composition guide button at the bottom of the screen, then select:
- Grid: Helps position the subject using the rule of thirds.
- Golden_Section: Helps place the visual focus around the golden-ratio areas.
- None: Turns off the composition guide.
Composition guides are for reference only and will not appear in the final render. Once the camera angle is ready, click Save Current View to save it for future use.

6. Start Rendering
After confirming the resolution, aspect ratio, lighting, environment, and camera settings, click Render at the bottom of the screen.
Recommended workflow:
1. Test the scene at 1K or 2K.
2. Check the composition, brightness, exterior direction, and camera obstruction.
3. Once everything looks correct, switch to 4K for the final high-resolution image.
When rendering is complete, click the image icon in the upper-right corner to open the render gallery.
7. Common Questions and Actions
What should I do if the image is too dark or too bright?
Adjust Ambient Light > Brightness in small increments and render again. If only the exterior background is too dark or too bright, adjust Exterior View > Brightness instead.
What should I do if a wall blocks the view?
Enable Clipping and adjust Clipping Depth until the camera has a clear view. Avoid clipping through furniture, walls, or the floor.
What should I do if the image edges look distorted?
Reduce the FOV. Use approximately 55° for a full-room view and avoid exceeding 65°.
How do I download or share a render?
Open the render gallery, then:
- Click the download icon below an image to download it.
- Click the share icon to share the render.
- Select multiple renders and click Download at the top of the page to download them together.

How do I render again from the same camera angle?
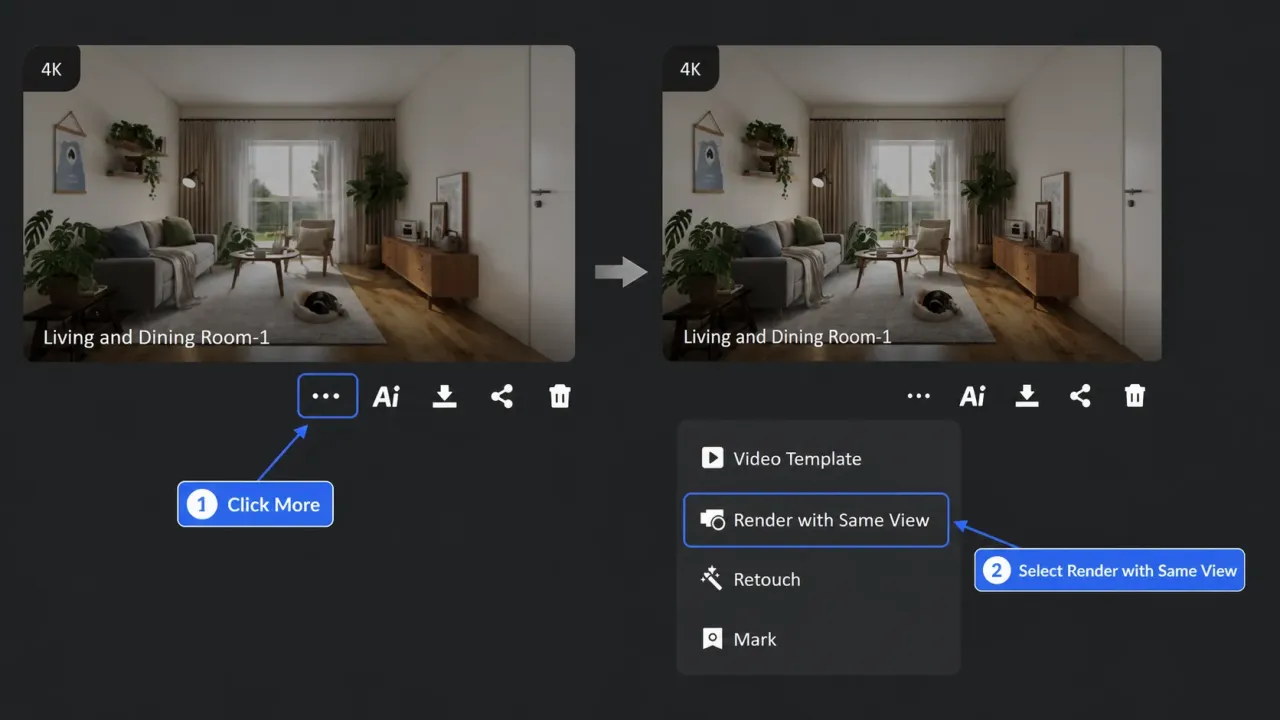
Find the completed image in the render gallery. Click More (···) below the image, then select Render with Same View.
Homestyler will return to the rendering interface and reuse the camera angle from that image, allowing you to compare different lighting, environment, or material settings.
You can now create a normal render in Homestyler. Start with the templates and recommended settings, then refine the result based on your scene.
