| Porch feature | Good starting choice | Watch out for |
|---|---|---|
| Narrow steps | One pumpkin grouping on a landing | Items that reduce walking space |
| Covered entry | Wreath, lanterns, and a small bench display | Hanging pieces that swing into the door |
| Open porch | Weather-resistant planters and sturdy pumpkins | Lightweight props that can blow away |
| Apartment landing | Door wreath and a compact mat | Shared walkways and building rules |
A front porch can feel festive without turning into a storage pile of plastic skeletons. The trick is to build the scene in layers: start with the doorway, add a few grounded pieces on the steps, then use lighting to make the details visible after dark. This step-by-step guide to front porch Halloween decor keeps the plan manageable, whether you have a deep covered porch or just a small landing outside an apartment door.
You’ll also find practical ways to keep walkways clear, choose weather-friendly materials, and make decorations easier to remove when the season is over. Pick a palette and a focal point first; the rest gets much easier.
Step 1: Check the Porch Before You Shop
Start by looking at the porch from the sidewalk, not just from the front door. Take a quick photo in daylight and another after sunset. The first shows where decorations might block a path; the second reveals which areas need light. Measure the width of the steps and the door area, too. A display that looks balanced up close can feel crowded from the street.
Choose one focal point. It might be the door, a pair of planters, or a pumpkin arrangement at the foot of the steps. Then limit the supporting details to two or three visual elements. I usually prefer a simple palette of orange, black, and warm white; adding one natural texture, such as dried corn husks or a coir doormat, keeps it from looking flat.
Before placing anything, check that the handrail, door swing, house numbers, and path to the entrance remain unobstructed. Keep decorations away from exterior lights and vents. If you use a doormat, make sure it lies flat and does not catch the door.


Step 2: Build Your Front Porch Halloween Decor in Layers
Once you know the space, decorate from the largest pieces to the smallest. This keeps you from buying little accents that have nowhere to go.
- Dress the door. A wreath gives the entry an immediate focal point. Choose a dark leafy wreath for a moody look, or add a few orange ribbons for a friendlier feel. For a rental, use an over-door hanger or a removable hook rated for the wreath’s weight. Check the door finish and the hook instructions before applying anything.
- Add height beside the entrance. A pair of planters, tall branches, or one lantern can frame the door. If you use branches, secure them in a heavy pot with stones or sand. Keep the arrangement away from the door’s path and avoid sharp twigs at shoulder height.
- Group pumpkins instead of scattering them. Use three or five pumpkins in different sizes, with the largest at the back and smaller ones toward the front. Real pumpkins bring natural variation; faux pumpkins are lighter and can be stored for next year. A mix of both works well, too. Keep them off damp soil and check real pumpkins regularly for soft spots.
- Add one texture. A little faux cobweb on a railing, a coir mat, or a bundle of dried corn husks is enough. Too much webbing can catch leaves and look messy in daylight. I’d skip it on a busy handrail where people need a firm grip.
- Finish with light. Use outdoor-rated lights and follow the manufacturer’s directions. Battery lanterns are convenient where there is no outlet; plug-in lights need a safe, dry connection. Avoid open flames near dried foliage, fabric, or paper decorations.
For a quick materials plan, expect the cost to vary widely depending on what you already own. Reusing planters and lanterns usually makes a bigger difference than buying a complete themed set. A few well-sized pieces tend to look more intentional than a dozen tiny props.


Step 3: Choose a Mood That Works in Daylight and at Night
A porch decoration has two jobs: look considered in daylight and read clearly after dark. For a playful scene, use friendly ghost shapes, bright pumpkins, and warm white lights. For a more atmospheric entry, try black branches, deep-colored flowers, and a few amber lanterns. Either direction can work; the key is repeating a small number of colors rather than adding every Halloween shade at once.
Lighting changes the whole arrangement. Place a lantern near the door or on a stable step, but never where it narrows the walking route. If you use string lights, keep cords secured along the edge of the porch and away from standing water. A timer can save you from switching them on and off every evening.
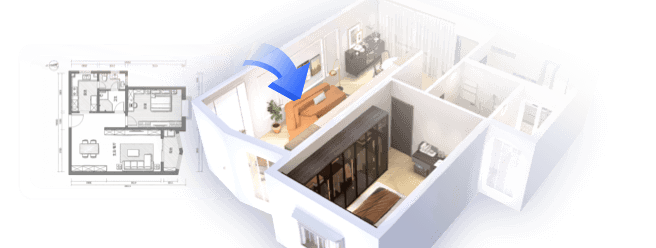
Think about the view from the street, too. A wreath may disappear against a dark door, while a pale pumpkin can stand out. If you are unsure about scale or color, sketch the porch or preview the arrangement in Homestyler before buying more pieces. It can help you compare a restrained palette with a busier one without moving heavy planters around.


Step 4: Make It Safe, Weather-Ready, and Easy to Remove
A good display should not make the entrance harder to use. Keep the center of each step clear, leave handrails accessible, and avoid placing small decorations where someone might mistake them for debris. If children or guests will be walking up after dark, check the route from the sidewalk with the lights on.
Weather matters. Wind can topple lightweight props, and rain can damage untreated paper or fabric. Use heavier planters as anchors, bring delicate pieces inside during storms, and choose outdoor-rated lighting. For decorations attached to a door or siding, test the removal method on an inconspicuous spot first. Adhesives can behave differently on painted, textured, or damp surfaces.
When Halloween is over, take down decorations in reverse order: lights first, then small accents, then larger pieces. Let everything dry before storing it. Keep wreaths in a box that protects their shape, and store faux pumpkins away from direct heat. A quick photo of the finished setup can help you recreate it next year without starting from scratch.
Start With the Door, Then Stop When It Feels Finished
You do not need to decorate every inch of the porch. Begin with the door, add a grounded pumpkin grouping, and use light to make the scene welcoming after sunset. If the walkway feels cramped or the display looks busy from the street, remove one item. That edit is often what makes the whole arrangement feel intentional.
Originally incubated at Autodesk, Homestyler has grown into one of the most widely adopted home design platforms in the world, now trusted by over 20+ million registered users (platform data, 2026). Whether you're a homeowner exploring ideas or a professional designer delivering client-ready renders, Homestyler brings industry-leading 3D technology to your fingertips — no experience required.
For a final check, stand at the sidewalk and look at the porch both before and after dark. Make sure the path is clear, the lighting is safe, and the focal point is easy to spot. If you want to test a different color balance or arrangement before shifting everything around, Homestyler can help you preview the idea. Then put out the pumpkins, switch on the lights, and enjoy the season.
Diseño ahora GRATIS